Ragdoll Boxing 3D Build Tiers (Season 1)
Rank height, wingspan, and weight archetypes — then retest after every physics or Ranked patch.
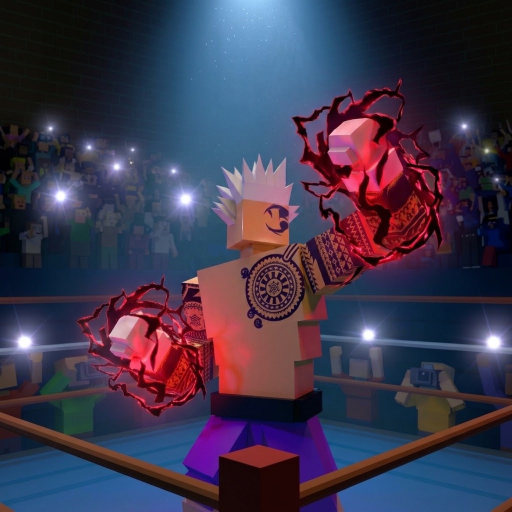
This page ranks build archetypes for Ragdoll Boxing 3D Season 1, not named fighters. Spins for height, wingspan, and weight (up to 7’0”) change how physics boxing feels: taller fighters control space, heavier fighters hit harder, and balanced fighters forgive learning mistakes. Meta shifts when Ragdoll Boxing Studios adjusts combat, matchmaking, or progression — treat every tier as a snapshot, not scripture.
Win condition stays fixed: knock them down three times. Clean head shots matter most. Block, weave, lean back, and counter. A top-tier spin still loses if you mash without defense.
For slider recipes, open Best Builds. For ring habits, use Combat Tips. For inputs, see Controls. Hub overview: Builds & Stances.
Ranking criteria
We score archetypes on:
- Reach control — can you jab and poke without eating counters?
- Knockdown threat — do clean shots actually fold people?
- Forgiveness — how many mistakes before you eat three knockdowns?
- Mode flexibility — Story Mode, Ranked (Bronze to Champion), and 2v2 Tag Team.
- Learning curve — can a new player make it work after the home-screen tutorial?
S tier — current strengths
Tall reach controller
Maximize height and wingspan. Keep the pocket long. Jab, circle, and punish whiffs. In Ranked, this archetype climbs when you refuse to chase into hooks. Weakness: if a heavy fighter closes and you panic-swing, you lose the reach advantage instantly.
Best modes: Ranked ladder climbs, Story Mode rematches where you already know ranges. Pair with: strict lean-back and weave discipline from Combat Tips.
Heavy finisher
Push weight for power. Walk opponents down, land clean head shots, and force knockdowns. In 2v2, a heavy finisher tags in to close rounds your partner set up. Weakness: shorter effective range and harsher punishment when you miss.
Best modes: Story Mode bosses you can pressure; 2v2 tag bursts. Pair with: footwork that closes without eating jabs — practice on Controls until weave timing is automatic.
A tier — strong with practice
Balanced fundamentals
Mid height, mid weight, usable wingspan. Ideal while you learn Season 1 systems: Story Mode’s 24-fighter island tournament, daily quests, Season Pass, and Level Road. You will not always win pure reach or pure power wars, but you survive mistakes long enough to improve.
Best modes: first Ranked sessions out of Bronze; learning the crown path in Story Mode. Upgrade path: once defense is stable, bias toward reach or power using Best Builds.
Counter-puncher mid build
Slightly longer than average without max height, with enough weight to hurt after a blocked exchange. Lives on timing: block or weave, then fire. Weakness: passive play lets aggressive heavies walk you down.
Best modes: Ranked when you already track opponent habits. Pair with: one rehearsed counter combo, not random flurries.
B tier — situational
Compact inside fighter
Shorter frame, aggressive entries. Excels when tall opponents spam predictable jabs you can slip under. Struggles into disciplined reach players who never let you close. Strong as a 2v2 surprise tag, weaker as a default Ranked main until your entries are clean.
Max everything experimental
Players sometimes chase every slider toward the extreme. Physics tradeoffs usually punish this: you get awkward timing without a clear identity. Fun for cosmetics sessions (KO effects, glove trails, emotes, tattoos, hair), poor for serious Champion pushes.
Mode-by-mode notes
| Mode | Prefer | Avoid early |
|---|---|---|
| Story Mode (24 fighters, one crown) | Balanced, then specialize | Untested max-everything spins |
| Ranked (Bronze to Champion belt) | Tall reach or practiced heavy | Brand-new compact entries |
| 2v2 Tag Team | Complementary pair (reach + power) | Two identical glass builds |
| Daily / Pass / Level Road grinding | Whatever you already land cleanly | Constant respinning |
How to move an archetype up a tier for you
- Complete the tutorial from the home screen.
- Spin once toward your chosen archetype (see Best Builds).
- Run several Story Mode fights focusing only on defense inputs from Controls.
- Add one offensive pattern from Combat Tips.
- Queue Ranked only after you can force knockdowns without panic mashing.
- Recheck Season 1 Update and Updates Hub after patches — tiers move.
Caveats (read before arguing in chat)
- Official marketing confirms height, wingspan, and weight spins up to 7’0”, Ranked Bronze-to-Champion with a belt, Story Mode’s island tournament, 2v2, Season Pass, Level Road, and daily quests. Exact numeric slider breakpoints are not fully published — tune by feel.
- This list is community guidance for the wiki, not a developer patch note.
- Cosmetics do not change tiers. Look good after you can win.
- Claim live rewards on Codes, then invest time in one archetype instead of hoarding spins.
Related links
- Builds & Stances Hub
- Best Builds
- Combat Tips
- Controls
- Players Hub — Ranked climb context
- Getting Started
- Guides Hub
Rebuild your personal tier board every time a fight feels different after an update. The S / A / B labels above are a starting map — your lab time in Story Mode is the real ranking.
Frequently Asked Questions
Quick answers about codes, builds, and combat.
Why is balanced only A tier?
Balanced is excellent for learning and stable Ranked starts, but dedicated reach or power builds usually win the same matchup once both players have solid defense.
Will these tiers stay accurate after the next patch?
Maybe not. Physics and Ranked changes can reshuffle archetypes. Recheck Updates and retest in Story Mode after every major drop.
Should I main tall reach for Champion?
Tall reach is S-tier when you keep distance. If you constantly walk into hooks, a heavy or balanced main may climb faster for you.
Do cosmetics affect build tiers?
No. KO effects, glove trails, emotes, tattoos, and hair are visual. Tiering is about height, wingspan, weight, and your habits.
Where should beginners start on this list?
Start balanced, finish Getting Started and Controls, then bias toward reach or power using Best Builds once you can block, weave, and lean consistently.